< 학습기록 >
📜 NEXT.JS
🟡 설치
npx create-next-app@latest .
typescirpt yes
eslint yes
tailwind css yes
src/ directory yes
app router yes
🟡 layout.tsx 구조
👉🏻 루트폴더에는 layout파일이 하나 있어야 하기 때문에, app 폴더 지우고 page.tsx를 새로 만들어서 npm run dev를 하면 layout.tsx를 자동으로 만들어줌 나머지 폴더에서는 자동으로 안 만들어줌 필수가 아니라서...
// /app/layout.tsx

export const metadata = {
  title: 'Next.js',
  description: 'Generated by Next.js',
}

export default function RootLayout({
  children,
}: {
  children: React.ReactNode
}) {
  return (
    <html lang="en">
      <body>{children}</body>
    </html>
  )
}
🟡 세그먼트 받기
👉🏻 next.js는 일차적으로 서버사이드 렌더링을 하기 때문에 콘솔이 안찍힘.
export default function LoginPage(params: any) {
  console.log(params)
  return (
    <>
      <h1>LoginPage Component</h1>
    </>
  )
}
👉🏻 대신 vscode terminal에 찍힘

👉🏻 params는 동적 세그먼트 가져올때, searchParams는 query string 가져올때 사용함
👉🏻 동적 세그먼트의 타입은 항상 string임
👉🏻 쿼리스트링 가져오는 다른 방법 : useSearchParams 훅
// app/blog/[blogId]/page.tsx

"use client"
import { useSearchParams } from "next/navigation"

type TBlogDynamicProps = {
  params: {
    blogId: string
  }
}

export default function BlogDynamic({ params }: TBlogDynamicProps) {
  // console.log(params.blogId)
  const searchParams = useSearchParams()
  console.log(searchParams.get("lang"))

  return (
    <>
      <h1>BlogDynamic Component</h1>
    </>
  )
}
👉🏻 page.tsx에서 use client를 사용할 경우 빌드할 때 에러가 나니까 주의 (그냥 공부중이라 임의로 작성)
👉🏻 하지만 useSearchParams 훅은 use client를 사용한 곳에서만 사용가능
👉🏻 클라이언트 렌더링을 하기 때문에 콘솔에 찍힘

🟡 hydration
👉🏻 next.js는 use client가 붙어도 next.js에서도 서버렌더링을 먼저하고 javascript 코드를 덧붙이는 형태
👉🏻 그러니까 일단 next.js는 서버렌더링을 먼저 하고나서 클라이언트렌더링함
👉🏻 hydration: 정적으로 html을 렌더링한 서버사이드렌더링에 동적인 상호작용을 넣어주는것을 말함.
🟡 metadata
👉🏻 가장 가까운 거를 먼저 가져옴
export const metadata = {
  title: "Next.js | blog",
  description: "Generated by Next.js",
}
👉🏻 템플릿의 %s는 특정 페이지의 제목으로 대체됨
// app/layout.tsx
export const metadata = {
  title: {
    template: "%s | next.js",
    default: "next.js",
  },
  description: "Generated by Next.js",
}


// app/blog/layout.tsx
export const metadata = {
  title: "blog",
  description: "Generated by Next.js",
}
👉🏻 generateMeta :동적 메타 데이터 생성 함수는 약속된 함수 ‘generateMetadata()’를 정의해서 내보내면 됨.
// app/blog/[blogId]/layout.tsx

type TProps = {
  params: {
    blogId: string
  }
}
export async function generateMetadata({ params }: TProps) {
  const id = params.blogId
  const title = `blog${id}`
  return { title }
}
export default function BlogLayout({
  children,
}: {
  children: React.ReactNode
}) {
  return <>{children}</>
}
🟡 not-found
👉🏻 경로에 오류가 생겨면 루트 컴포넌트의 not-found.tsx가 나오는데 루트 컴포넌트의 not-found말고 가까이 있는 not-found.tsx를 가져오고 싶으면 함수로 notFound()사용해주면됨.
// app/blog/[blogId]/page.tsx

import { notFound } from "next/navigation"

type TProps = {
  params: {
    blogId: string
  }
}
export default function Blog({ params }: TProps) {
  const { blogId } = params
  const id = Number(blogId)
  // 숫자인 경로만 받고 싶어서 예외처리함
  if (isNaN(id)) {
  // 가까운 not-found.tsx 파일 호출
    notFound()
  }

  return (
    <>
      <h1>Blog{blogId} Component</h1>
    </>
  )
}
👉🏻 동적 폴더에 notfound페이지를 만들었으면 ⇒ useRouter().push(”/blog/page/notfound”)사용
// app/blog/[...notfound]/page.tsx

export default function BlogNotFound() {
  return (
    <>
      <h1>BlogNotFound Page</h1>
    </>
  )
}
// /app/blog/[blogId]/page.tsx
"use client"
type TProps = {
params: {
blogId: string
}
}
export default function Blog({ params }: TProps) {
const { blogId } = params
const id = Number(blogId)
if (isNaN(id)) {
useRouter().push("/blog/page/notfound")
}
return (
<>
<h1>Blog{blogId} Component</h1>
</>
)
}👉🏻 하지만 이렇게 하면 use client 를 페이지 컴포넌트에서 클라이언트 렌더링을 하기 때문에 안좋음 return도 해줘야함….
👉🏻 서버 컴포넌트에서 쓰고 싶으면 redirect 사용해야함
👉🏻 redirect(”/blog/page/notfound”) 서버컴포넌트에서 사용가능
// /app/blog/[blogId]/page.tsx
import { redirect } from "next/navigation"

type TProps = {
  params: {
    blogId: string
  }
}
export default function Blog({ params }: TProps) {
  const { blogId } = params
  const id = Number(blogId)
  if (isNaN(id)) redirect("/blog/page/notfound")

  return (
    <>
      <h1>Blog{blogId} Component</h1>
    </>
  )
}
🟡 useRouter()
"use client"
import { useRouter } from "next/navigation"
//가져오는 거 주의 app 라우터는 navigation꺼 가져와야함
import { TbFaceIdError } from "react-icons/tb"
export default function NotFound() {
  const router = useRouter()
  const prevPage = () => {
		router.back() // back() - 이전 페이지로 이동
  }
  const homePage = () => {
    router.push("/") // push("경로") 지정된 경로로 이동
    // router.replace("경로") 지정된 경로로 이동하는데 직전 페이지 기록이 안남음
  }
  //Link 컴포넌트로 감싸서 이동해도됨 : 오히려 웹 친화적임 a 태그로 바껴서 나가기 때문에.

  return (
    <div className="w-full h-screen flex flex-col items-center justify-center">
      <TbFaceIdError className=" text-[100px] text-red-300" />
      <h1 className="text-[50px] font-bold">...앗...</h1>
      <p className="max-w-[300px] text-lg">
        이 페이지는 사라졌거나 다른 페이지로 변경되었어요. 주소를 다시 입력해
        주세요
      </p>
      <div className="flex gap-4 mt-4">
        <button
          className="w-[95px] bg-blue-500 rounded-md text-lg p-4 text-white"
          onClick={prevPage}
        >
          이전으로
        </button>
        <button
	        className="w-[95px] bg-rose-500 rounded-md text-lg p-4 text-white "
	        onClick={homePage}
	      >
          홈으로
        </button>
      </div>
    </div>
  )
}
🟡 async / await
👉🏻 async/await은 client 컴포넌트에서 사용불가 server 컴포넌트에서만 사용 가능

🟡 loading
👉🏻 데이터 통신과 같은 요청 사항이 발생하여 로딩이 길어질 경우 서버 컴포넌트는 화면에 내용이 아무것도 표시되지 않음 경로이동도 안함 ⇒ 전부다 완료되어야 보여줌
// src/app/about/page.tsx
import ServerOne from "@/components/ServerOne"
import ServerTwo from "@/components/ServerTwo"

export default function About() {
  return (
    <>
      <h1>About Component</h1>
      <ServerOne />
      <ServerTwo />
    </>
  )
}
// src/components/serverOne.tsx
export default async function ServerOne() {
await new Promise((resolve) => setTimeout(resolve, 2000))
return (
<>
<h1>ServerOne Component</h1>
</>
)
}// src/components/serverTwo.tsx
export default async function ServerTwo() {
await new Promise((res) => setTimeout(res, 4000))
return (
<>
<h1>ServerTwo Component</h1>
</>
)
}👉🏻 이때 해당 라우트 경로에 loading.tsx 파일을 생성하면, 서버 컴포넌트의 늦은 응답 시간에 loading.tsx 파일의 내용을 보여줄 수 있음 👉🏻 loading.tsx는 자신의 컴포넌트와 가장 인접한 파일을 보여줌
👉🏻 폴더안에 loading파일이 없으면 상위컴포넌트를 계속 올라가서 먼저 접하는 loading파일을 보여줌
// app/about/loading.tsx

import { AiOutlineLoading3Quarters } from "react-icons/ai"

export default function AboutLoading() {
  return (
    <>
      <AiOutlineLoading3Quarters className="animate-spin" />
      <h1>AboutLoading Component</h1>
    </>
  )
}
👉🏻 loading.tsx 특징
- loading.tsx 파일은 루트 경로 및 각 라우트 폴더에 생성할 수 있음
- 각 라우트 파일에 생성한 loading.tsx 파일이 우선시 됨
- 라우트 경로에 별도의 loading.tsx 파일이 없는 경우 루트 경로의 loading.tsx 파일을 사용
- loading.tsx 파일이 없으면 서버 컴포넌트 로딩 발생시 화면이 표시되지 않음
🟡 Suspense
👉🏻 React 18에서 도입된 Suspense는 Next.JS에서도 지원됨
👉🏻 Suspens를 사용하면 각각의 요청을 병렬적 + 개별적으로 로딩할 수 있음
// app/about/page.tsx
import ServerOne from "@/components/ServerOne"
import ServerTwo from "@/components/ServerTwo"
import { Suspense } from "react"

export default function About() {
  return (
    <>
      <h1>About Component</h1>
      <Suspense
        fallback={<h1 className="text-red-300">suspense one loading...</h1>}
      >
        <ServerOne />
      </Suspense>
      <Suspense
        fallback={<h1 className="text-blue-300">suspense two loading...</h1>}
      >
        <ServerTwo />
      </Suspense>
    </>
  )
}
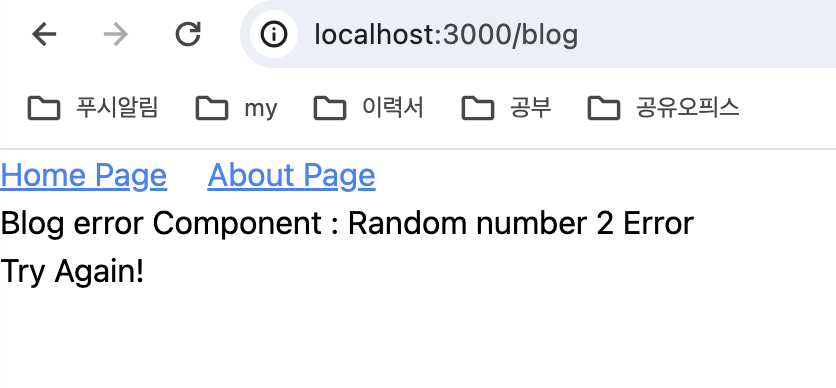
🟡 error.tsx
👉🏻 컴포넌트에서 에러가 발생했을 때 사용자에게 보여주는 페이지임
👉🏻 경로마다 중첩해서 사용할 수 있음
👉🏻 가장 가까운 경로의 error 컴포넌트가 실행됨
👉🏻 error 컴포넌트는 error와 reset을 props로 받아서 사용함 (reset : 에러 컴포넌트가 자체적으로 제공하는 기능 리렌더링 해줌)
👉🏻 error는 객체, reset은 함수
👉🏻 reset함수를 실행하면 이전 컴포넌트가 리렌더링됨 (단, 이전 컴포넌트가 클라이언트 컴포넌트 일 경우에만 해당됨)
// src/app/blog/page.tsx
import BlogCard from "@/components/BlogCard"

export default function Blog() {
  return (
    <>
      <h1>Blog Page</h1>
      <BlogCard />
    </>
  )
}
// src/components/BlogCard.tsx
"use client"
export default function BlogCard() {
const random = Math.ceil(Math.random() * 4 + 1)
console.log(random)
if (random === 2) {
throw new Error("Random number 2 Error")
}
return (
<>
<h1>BlogCard Component</h1>
</>
)
}// src/app/blog/error.tsx
"use client"
export default function error({
error,
reset,
}: {
error: Error
reset: () => void
}) {
return (
<>
<h1>Blog error Component : {error.message}</h1>
<button onClick={reset}>Try Again!</button>
</>
)
}
11일차 후기
next.js는.... 쉬운것 같아보이지만 복잡복잡

오늘은 새롭게 에러 컴포넌트가 가지고 있는 reset기능 배워서 좋았던 것 같다.
본 후기는 본 후기는 [유데미x스나이퍼팩토리] 프로젝트 캠프 : Next.js 1기 과정(B-log) 리뷰로 작성 되었습니다.
'TIL' 카테고리의 다른 글
| [유데미x스나이퍼팩토리] 프로젝트 캠프 : Next.js 1기 - 프로젝트 1주차 (0) | 2024.06.24 |
|---|---|
| [유데미x스나이퍼팩토리] 프로젝트 캠프 : Next.js 1기 - 사전직무교육 12일차 후기 (06. 11) (0) | 2024.06.11 |
| [유데미x스나이퍼팩토리] 프로젝트 캠프 : Next.js 1기 사전직무교육 7~10일차 (2주차) (0) | 2024.06.09 |
| [유데미x스나이퍼팩토리] 프로젝트 캠프 : Next.js 1기 사전직무교육 4일차 (05.29) (0) | 2024.06.09 |
| [유데미x스나이퍼팩토리] 프로젝트 캠프 : Next.js 1기 사전직무교육 3일차(05.28) (1) | 2024.06.07 |